
or
I get tons of email asking about importing poser figures into bryce and how to get the textures to apply properly. Most people are trying to get the textures they apply in poser to show up in bryce. As near as I or anyone else I've talked to, it can't be done. Not directly anyhow. There is a common way of doing such though and this tutorial is aimed at explaining how.
We're going to use the default female pose on this model and the default female nude texture.
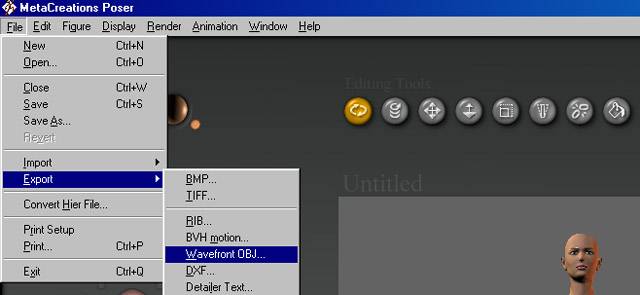
Start by creating your figure in poser...........After posing your figure (we're leaving it at default here) choose.....file.......export........wavefront OBJ.
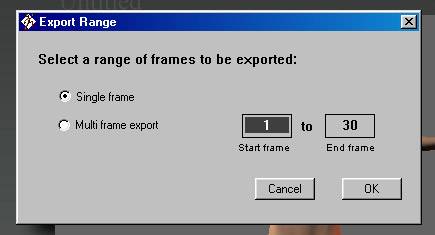
Select "Single Frame"..........
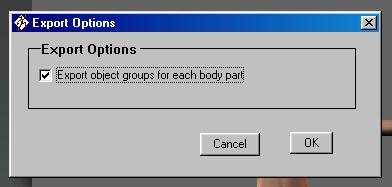
Select "Export object groups for each body part"......
Close Poser.
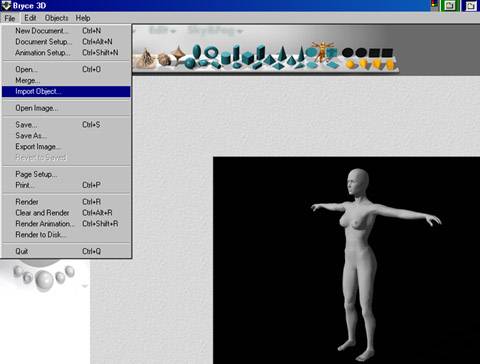
Start bryce (to your existing scene if applicable) and using 'file'-'import' , import your figure (shown here in default grey)
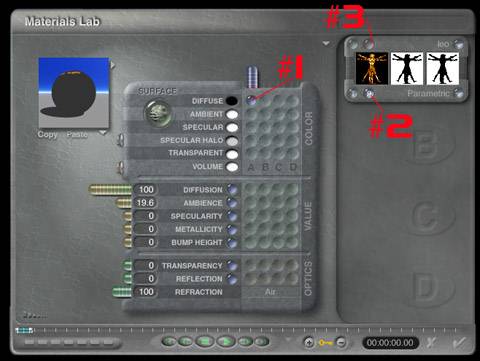
Click on your figure and select "M" next to your figure to start the material editor. Click on "diffuse" channel A (#1) then on Picture texture (#2) and then on LEO (#3)
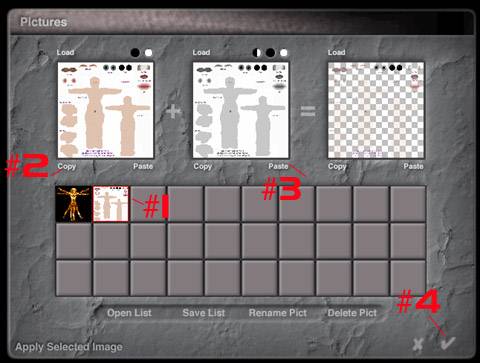
When the picture editor appears, click on an empty slot and go to your poser texture directory (the default is in the poser directory/runtime/texutres/poser3textures) and find Nude Woman Texture.tiff. Choose this file and when back in the picture editor, select (#2) copy, then (#3) paste, answer "delete" to the box that appears and select (#4) to exit back to the material editor.
 **New for
Patched Poser**
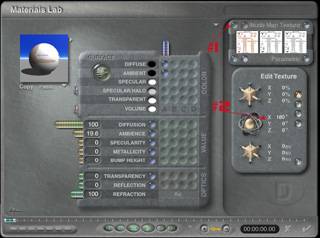
**New for
Patched Poser**If you are using the 3.0.1 patched version of poser, you must select the edit texture button (#1 above) and then type in 180 in the x rotation line (#2 above). Just click on the 0 in that space and a type in box will appear.
Check that mapping is set to 'Parametric' . Click on the first column by ambience. Choose the check mark to return to the bryce main screen.

There it is, the texture applied with correct mapping.

Here's a close up of the face showing the mapping.
Hope this answers your 'skinning' questions!
Ed Baumgarten
www.stewstras.net/baument/downloads.htm